The Top 5 Easiest (FREE) Apps to Use With Trial Teaching

free easy apps for discrete trial or small group teaching

Do you use Apps for Trial Teaching?

If you work in early childhood or special education classrooms, you have probably heard of “discrete trial teaching”. Regardless of your views on the topic, trial teaching has been proven to help students both retain and learn new information, especially specific and concrete things like colors, numbers, shapes, and letters. 

But running a trial center can become repetitive. There are only so many times your kids will want to see colors and numbers on flashcards. So how can you make learning this information fun for your students? Enter technology.

If you are blessed with a tech-heavy classroom or barely has an iPad to its name, there are so many fun options to incorporate and ‘jazz-up’ your trial teaching program. Here are some easy and FREE apps for your phone or iPad to get you started running an exciting trial center in your classroom. 

 Colors & Shapes – Learn Color 

By RV AppStudios LLC

In this free and fun game from RV AppStudios, kids can match shapes to shadows, pick colors from a field of 3, or trace outlines. Run a center by playing “Color Pop”, having your student find the target color by popping the target color balloon as they float by on the screen. Or for a more complex task, have students match household items with similar colors. Adorable graphics, motivational phrases and feedback, and no Ads! You can’t ask for much more in an educational app! 

Math Kids- Add, Subtract, Count

By RV App Studios

Okay- you can see I have a very loving relationship with RV AppStudios! I am all for the ad-less and totally free simple math games that keep kids engaged.  Begin with a simple counting activity or move to add or subtract pictures of cute objects.  Lucas the Lion is back to give students encouraging words and feedback when they get the correct answer. My teacher favorite? No annoying buzzer noise when they get the answer wrong that can accidentally become a reinforcer. 

Music Color

By SoundTouch Interactive

This adorable app by SoundTouch Interactive combines easy touch, vibrant colors and images, and classical music for a beautiful experience. This free app has no ads (swoon) and while designed for free touch and exploration by children, also has an option in each color for a ‘find the color’ game from a field of 4. In my classroom, we also used this in our speech and language center to work on expanding sentence length and vocabulary. Have a child choose an image from each color and describe what they see. Instead of saying “I see ball.” they could expand to “I see a blue ball”. 

Sightwords

By eFlashApps

Nothing flashy here, and that’s why it’s gold. You have to suffer through a few banner ads but nothing too distracting. The sight words that they use are common Fry words and are sorted by Pre-Primer, Primer, K through to 6th grade. In my classroom, we used this app to run sight word trial practice. Students would choose to complete 10 or 15 words for a reward. Cute graphics and the ability to turn voice and music on and off help turn this app into a solid teaching tool. 

Sort It Out

By MyFirstApp Ltd.

This app is great for practicing sorting by category, students can place items by dragging and dropping them where they belong (Cars go on streets, boats go in the water, etc). Run trials by asking the child “Where does an Airplane go?” and having them drag it to the correct place. Downside: the full version will cost you a few bucks. 


In a post-Covid world, the data is in. Technology is essential in any classroom. Both students and teachers can benefit from adding fun and enjoyable apps to your classroom routine. If you run a classroom that is strong on routines and small group centers, these apps for trial teaching can help students with the potential boredom as the mid-year slump of the routine sets in. 

Do you have any go-to apps you love for your class? Drop a recommendation below!


Using Adapted Books Effectively for Special Education in Classroom or Distance Learning!

Most Special Educators or Early Educators (Pre-K/K/1) teachers I know LOVE a good adapted book. But what do you do with these things? Just read them? Set them in front of your student and hope they participate?  

Like most things with our students, the engagement with these books must be taught, but once you teach it, these adapted books are an awesome tool to help build vocabulary, increasing sentence length, or even as an engaging social story to help practice and learn behavior basics.

How to Teach with Adapted Books:

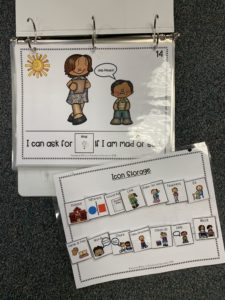
There are a few ways you can practice and increase your student engagement with these books. When first introducing them to my students or with my lowest level learners, I will give errorless choices in a small group setting. For example, I present the page and read the sentence while filling in the blank with the word. Then I may ask “Who has the word “Yes!” The student will respond by handing over the icon to finish the sentence or placing it on the blank themselves if they are able.

I also can use these books in a 1-1 setting, even with students who need 1-2 choices. For example, when I used these books with students with MD who had limited arm movement, I would present the page to the student and read aloud. Then I would ask the student which word (icon) fits in the blank. I could place the icons farther apart on a choice board and have the student either move their arms or head to indicate which choice (also works for students who use eye gaze choices!)

In a larger group, you can give each student 1-3 icons to ‘hold onto’ for you. When you come to a blank you can either fill it in verbally and then ask “who has ___”. The students must look at their icons, determine if they have the correct one to fill in the blank, then raise their hand, and engage to answer! (That’s like 4 different skills with 1 activity)

Students can also use these independently or in centers. You can simply collect all icons on one page *icon storage pages are provided in my books* and have the student go through the book, matching the correct icon to each page. 

What can you learn with adapted books?

There are 3 types of Adapted Books that I create:

Social Story/Behavior Basics
These books are the ones I use most often in my large groups. These books are written in the first or second person to create a social story feel and go over specific situations. The adapted nature of the books allow students to choose their response. Some of my favorites include: Our Recess Rules (practicing appropriate behaviors on the playground) and I Can Make Friends (social skills for making friends).
These also include specific scenarios that may be more difficult for our students, such as Fire Drills, Lockdown Drills, and Celebrating Holidays. They walk students through the scripts of what things in their environments may change and what to expect. Going over differences in routines and expectations before the event can drastically reduce the chance of problem behaviors!

Specific Skills
Occasionally I will make books to target specific skills. Books like the What, How Many, What Color practice skills of IDing Colors and animals, and counting to ten.  The What is Where book used items to practice common positional prepositions such as IN, ABOVE, ON, UNDER, etc!

Informative/Lessons

The last type of book I create are ones that are intended to tell a story or lesson about a person or event. For example, our Black History Month series teaches about the lives of Ruby Bridges, Martin Luther King Jr, and Rosa Parks in an interactive and accessible way. The Community Helpers books teach lessons on types of helpers and their tools.

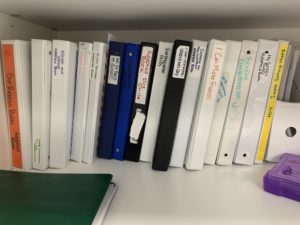
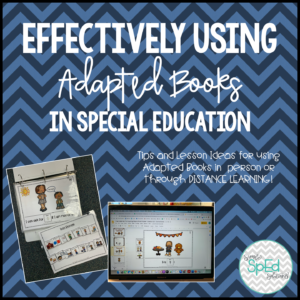
Once you determine your target teaching goals and pick your book, you can choose whether to use the book as a physical book or digital activity.  (This is my adapted book library, we do not have a binding machine so I keep them in binders!)

I had always used my adapted books as physical books for students who may need physical and visual icon choices, so when we moved to distance learning, I was hesitant to modify my books for use in my online classroom. However, I am SO glad I took that plunge. It took some time, but now we use adapted books ALL the time and we’re still full distance learning. If you have purchased one of mine in the past, you can re-download to get the Google Slides link for FREE!

One of my favorite ways to use them during ZOOM lessons (or Google Meets) during our speech consults. My SLP loves to see the students using the images to increase their sentence length and learn new vocabulary words. 

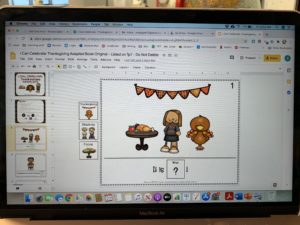
First, I will share my screen with a small group. I have placed 3 icons on the side of every page in the adapted book, one correct and 2 incorrect icons to choose from. You can copy and paste to add more or remove to create fewer choice options depending on the level of your students.  I will read through the sentence and ask the student to choose which icon fits in the blank. If the student can read on their own, they can! If the student is able to use “remote control” on the ZOOM app and drag it themselves, GO FOR IT! If you want the student to annotate and circle what they think is the correct answer, DO IT! The possibilities really are endless and they are so easy to adapt to each child’s learning needs. 

Don’t forget to browse my Adapted Book library HERE.

Did I miss anything?? How do you use Adapted Books in your classroom? Comment below!

Distance Learning Tips for your SpEd Classroom that WORK!

Distance Learning Title Image

Distance Learning.  It is the beast of burden for most teachers and families in America at the moment. From the first shut downs in March to starting the new year, almost every teacher and student has had to complete distance learning in some form or another. 

For our students with special needs and their families, this burden is especially high. Parents are put in the role of teacher, speech therapist, occupational therapist, behavior specialist, and paraeducators with little to no training! I honestly can’t imagine having little to no help at home, let alone having to work from home at the same time as having to provide full time care AND schooling for a child with different needs.  They are the true heroes here!

But let’s talk about YOU teachers. Especially those teachers who are NOT going back to the classroom yet.  Here in Northern California, our cases of COVID are still very high, and still climbing.  My district planned on a hybrid OR digital model, but then the entire county moved to digital learning until case count comes down.  While I am relieved that I will not be a potential transmitter of the disease into my family, I desperately miss teaching in my classroom, I know that they thrive in the environment we have set up for them.  

However, after a LOT of planning, preparing materials and packets, making online work and finalizing our google classroom, I can honestly say it is going MUCH BETTER than I expected! So here are some tips if you are new to the online teaching game or just need to shake things up. 

Tip 0: Build Family Connections

I wasn’t going to add this in as I have a whole separate post on this in my brain but I decided it is important and I need to share! Family connections are more important now than ever, especially if you have new students you’ve never met before.  Call parents, text them using Talking Points or RemindApp, send daily e-mails, update your website, have 1-1 Check ins. Let them know you are HERE for them! 

Distance learning is not right for everyone. Some families may drop out, some may fully move to homeschool or private school. Do NOT take it personally! That is NOT your fault! If you make the connections, try your best and have the best interests of the child and their families, they will see and appreciate you and your efforts.  Even as difficult as the process may be for us, it is equally, if not more, difficult for them. 

Tip 1:  MASTER SCHEDULE

A Master Schedule is essential for keeping yourself and your families sane.  Ours looks like this:

Our schedule is mainly dictated by our district.  Our district requires teachers to participate in a certain number of synchronous and asynchronous learning minutes per day based on the children’s ages and grades.  Unfortunately this requires a LOT of LIVE zoom/google meet sessions for our students with special needs.  But in a surprising turn of events, I actually had a LOT of parent and student buy so far!  How?  Keeping small groups short, keeping circle fun and engaging (share your screen and dance along to Koo Koo Kangaroo at the end of every circle, I guarantee they will come back for more!), and making things reasonable and clear for parents, especially if they have to sit through the whole online time with their student. 

If students are unable to make the live ZOOMs (due to parents working, etc), the worksheets are posted online in the google classroom as slides or parents are given a paper packet option (pick up/drop off each Friday). 

I also make sure my worksheets correspond to what my paras are teaching that day.  If students are in the Live Zooms and Small Groups, then they can simply finish the worksheets at that time! Easy! Done! No extra work! It works out to about 6 worksheets/activities per day. Sounds like a lot but pretty similar to what we were doing in our classroom.  If you want to assign less worksheets and more activities, you could plan your week to look something like this (this was for my upper level ESY group):

Tip 2:  Use your Paras!

I’ll admit it, my paraeducators are fantastic.  During the school year, I rarely have to create lesson plans for them because they follow the curriculum well, take great data, and know how to work with our kiddos.  

Since I need to plan our worksheets and packets a week in advance in order to get the packets to parents on time, I have been lesson planning for my paras.  It is a weird experience for them not having total autonomy over their lessons, so I try to give them as much flexibility as possible. Here is an example of my “lesson plans”. Currently my A/B groups are doing the same level work, and we have small group lessons 2x a day (morning and afternoon). 

We hold small groups through breakout rooms *more on that next*, because I need to be able to supervise all small groups- So currently I am not running one. 

Data is done as observation notes on a single sheet- they send to me later and I compile onto an excel doc for easy access.  This is NOT how I did data last year, but lets just say data for over 150 student goals is not feasible for distance learning, so we are improvising! it also helps me keep track of what is working and what isn’t.

Tip 3: Breakout Rooms

I was hesitant to use breakout rooms because I had heard horror stories about them not working, ruining the ZOOM, etc.  But it really is the easiest way to do small group rotations. 

We use my “personal meeting room” for all of our circle times and small groups.  It is ONE link that parents can just save to their desktops.  To create small groups, simply click the breakout room at the bottom of the ZOOM screen, how many rooms you want (3 for 3 small groups) and assign students and teachers/paras!  We have also been experimenting using an extra room for ‘pull out’ OT and speech services, saving parents the headache of finding and using multiple URLs.  Plus, I can “join” and “Leave” each group to check in, help out with tech, etc!

Tip 4: Google Classroom/ Slides

My Google Classroom was a mess until I organized everything into specific topics.  I also have each paraeducators worksheets separated so that they can open their files individually. You need to find what type of organizational method works for you, then stick to it!

google classroom organization

If you’re not using Google Slides in your classroom, are you even teaching online?!I know, some schools require you to use Schoology, or Seesaw or some other learning platform. But I am LOVING google classroom, the main reason being able to assign google slides.  If your students are in a pickle where they cannot print, can’t pick up packets, or simply need easy drag and drop activities similar to File Folder Games or Task Boxes, then using Google Slides is the way to go.  There are so many good tutorials on Youtube on

how to make your own ( Pocketful of Primary is my personal fave).  But there are also hundreds of new digitized Google Slides resources ALREADY MADE for you on TPT! You can also printscreen curriculum your district requires and make it interactive!

google slides description

Which brings me to:

Tip 5: DON’T Re-invent the Wheel!

Why spend hours creating a digital worksheet for something when there is ALREADY something perfect waiting for you! Before you spend hours making something yourself, Search GOOGLE, Use curriculum you already have, search Teachers Pay Teachers, etc!

Chances are, there are activities, worksheets, or slides already pre-made for you that can focus on that child’s IEP goals. If you’re looking for an easy way to start your year digitally, check out my Get Started Pack with 50 worksheets pre-made into Google Slides for digital OR paper packets! 

lets get started pack description

Whatever your district is doing this year, in person, hybrid, or fully distance learning, I know that is is not ideal.  Nothing is ideal right now with a nasty virus hanging over our country like a cloud.  There is no winning in any situation for teachers or the families and children they serve.  Try to stay positive, and know that you are doing the best you can! 

What other tips can you share for distance learning in your SpEd Classroom? Share below!

xSamantha

The Sh*t They Don’t Tell You About {SpEd} Teacher Interviews.

Screen Shot 2019-09-22 at 1.12.48 PM

**This post is adapted from my original**

While I doing some research to help one of my former Paraeducators prepare for her first teacher interview, I realized that while there are lots of articles and blog posts about Teacher Interviews, they seem to fall short in material for Sp-Ed teachers!  So not its time for: The Shit They Don’t Tell You About: SpEd Teacher Interviews!  Here are a few tips for your Job Hunt and Interview, with an appropriate amount of realness and humor, mainly geared towards SpEd Teachers.  But these tips will work well for any teacher or para position as well!

Since High School, I have held 3 para jobs and 4 different teaching jobs due to many moves, and I have been on interview panels for both teachers at my site, as well as para-educators in my classroom.  And while I do not hold an admin credential or HR certificate (I’m sure my HR Manager Sister will correct me if I am wrong on any points here), I feel pretty confident that these tips could help you out in your job hunt.   If you think of any more, feel free to add them in the comments!

  1. Tailor (AND PROOFREAD) your Resume and Application
    OK, so this one is more before the interview, but it is so important!  I get snapchats from my sister almost daily with Candidates making huge spelling mistakes or gaps in their application.  Even if you are using an online job hunting tool (like Edjoin) to complete your application, make sure that the Resume is proofread by a friend or parent, is in an openable and readable format (export to PDF ya’ll!) and that all of the items they ask for, such as credential copies, degrees, or transcripts, are attached.  Feel free to TAILOR your Cover Letter to your potential employer.  It may take a little extra time but trust me, they can tell! And that extra effort is worth it to them. (Bring a copy with you, most employers will already have one, but it’s good to have just in case!)
  2. Do Your Research
    Nothing says inexperience more than showing up to an interview with NO IDEA what the job or school is all about.  You don’t need to know the backstories of all of your interview panel but please at least read the Job Description. Ask clarifying questions to show that you are serious about the Job’s demands (For example: “I read that this job requires Case Management of my students, what supports are available to assist in case managing?”). It will also help if you know what the grade level or support level the job is asking for so you can help tailor your responses. If the school is proud of their new technology or a championship team, it will look good on your end to bring those things up in conversations.
  3. Look the Part
    Regardless of the dress code at your potential job, my motto is always to “Dress for the job you want (IN 20 YEARS)!” I might want a teaching job today, but who knows, in 20 years I may want to be Superintendent! So it does not matter if your potential school lets you wear jeans or sandals, please don’t wear them to your interview.  Yes, even your nice ones.  Leggings are out as well, even if like me, you live in them.  Dress Slacks or Skirt, Conservative Top or Decent Dress. Hair Groomed (Men, you too!). No cleavage or boxers showing.  You don’t have to wear a face full of makeup but maybe a little mascara and CC Cream to cover those under eye bags? (I know I’d look a bit Zombie-like without my concealer and that doesn’t exactly scream professional teacher).   Does this sound sexist? Too Conservative? Etc? I’m sure you’re sitting there saying, “Umm excuse me this is 2018 I don’t need to conform to those rules”  True.  You don’t have too.
    But guys, this is real life here, and chances are your interviewers are either from a generation that expects this level of professionalism, or respects the position and will not place someone in it who does not respect it as well.  You could be teaching in the Hippy-est part of the country, but with all experience being the same, an interview team will hire someone that respects themselves and their future position enough to present themselves well over someone who does not.  They also know that your future students Parents want to see a teacher that cares about presentation while they are molding future minds.  Annoying, maybe.  But true nonetheless.
  4. Prepare for the Questions!
    Ah Yes, the dreaded question portion, AKA the 10 minutes of your life that they get to judge you relentlessly based on every little word you say.  That’s why my mantra is LESS is MORE!  “But Samantha, I want to let them know that I know EVERYTHING I need to know to be a great teacher!”  I get it.  I was there.  I wanted them to know that I knew all about Curriculum and TEACCH and Behavior Management and ABA and PECs and RTI and ASJDSDJG….. You see how it just turns into Word Vomit at some point? You want the interview team to remember the good points of what you say, and they can’t do that if they are busy trying to jot down and remember ALL of what you said.  The likelihood that you will be word vomiting after 2 minutes of an answer is very high.  Try to keep your answers short and concise.  If it is a two part question, try to answer both parts in order and reference the question in your answer.
    It does help to know your stuff in regards to your potential new position! If they run off of an ABA model, research all you can about it and come prepared.  If you know they use a certain curriculum, it will give you bonus points if you show you know how to lesson plan or administer it.
  5. Paras….
    A basic rule of thumb about questions dealing with paras is, always defer to your district!  It may not seem like it, but they do not want to hear how you will come in and change how everything about your classroom and any instructional aides is handled, even if you only have the best intentions.  The chances are, your paraeducators (IA’s, aides, etc) have been there longer than you, they know the students and district better, and they are used to certain routines.  The admin knows that some Paraeducators are resistant to major changes. Saying that you will come in “Dictator-Like” and change things can be a red flag for districts with Older and experienced paraeducators because they know that there will be personnel trouble later on.  Some key phrases to remember when answering about paraeducators or staff management: “I am open to suggestions,” “I respect their experience and knowledge regarding the current students”  “I am looking forward to collaborating”.  Also know that no two districts are alike. Just because you may be the direct supervisor of your paras in one district, the principal or special education coordinator might be the supervisor in the new position. It is good to ask about your role!
  6. And Parents…
    Different districts have different policies about parent communication.  If you are in a high litigation district, they may request that you keep copies of parent communication. Other districts let you text with your parents and students casually.  Again, it is always good to ask before you answer a question with limited knowledge!
  7. Ask the Questions! 
    There are a few key questions I always like to add at the end of my interviews besides if I have any real questions about the position.  One is “Do you have any questions or concerns about anything on my resume?” Some interviewers are restricted to only ask certain questions of candidates. Asking this at the end allows them to ask you about anything they may question after the interview in your resume such as gaps in your experience.
    I also like to ask about administrative support, assessment teams, and any extra responsibilities that I may have to take on in this role.

Well I hope that this helps any future teachers! I know that I didn’t get into the nitty-gritty of the different questions you may be asked. But this post was already getting pretty long and honestly I don’t think that it would even be the same for two seperate districts.  You have experience, and you know what you know. Be confident but also ready and open to learning new things!

Good Luck!


INTRO: The Sh*t They Don’t Tell You: A Special Educators No Nonsense Guide to the Field

Screen Shot 2019-09-08 at 2.19.23 PM**Caution, if you couldn’t tell by the title, this series may have some iffy language, if you’re easily offended, it may not be for you!**

Hello friends!

Welcome to my new Pet Project! The Sh*t They Don’t Tell You About Teaching Special Education!

I was inspired to write this series of posts while reading a similar book about Pregnancy and Newborns when I had my first kid.  I thought, “Hmm, this is some real shit, I wish they had this stuff about my job when I first started…”  This became more deeply my stance when I kept hearing stories from new Special Educators (Or Educators in general) listing all of the things that they DID NOT learn in Grad school!  I mean, what is even the point of going through 4 years of college and getting a post graduate degree if they aren’t going to prepare you for the Real World of Education?!

And so this blog series was born.

If you are a General Educator, Para-educator, etc, don’t worry! While most of this series was written from and for a Special Educators perspective, I’m sure you’ll find the information, and maybe even the humor, relative to your jobs as well.

Now as I mentioned above, the language may be a bit iffy.  And the topics may get a little intense.  I do not mean to cause a debate, although I welcome rational (lol) human conversations and discussions in the comments .  This information is coming from both my experience in the field, as well as actual research and discussions with other educators in the field. So it’s not all just my opinions.  But some of it is (it is My Blog after all).  So take it with a grain of salt and hopefully a glass of wine, and realize that while I hope you relate or learn something, it is also meant as entertainment. 

So lets dive right in to the First Post in this series:
What The Eff Can I Do With This SPED Degree?

Oh my sweet summer child, the opportunities are endless!

No really. You have a LOT of options.

In some states (California for example) you need to choose the direction you want to take your career before you get your degree.  The credential choices can include Mild/Moderate, Moderate/Severe, Deaf/Hard of Hearing, Visually Impaired, Orthopedic Impairment, etc etc.  And will all depend on where you ultimately see yourself teaching.

A lot of teachers I think are ‘afraid’ of that SpEd degree because they think that it will pigeon-hole them into a Self Contained Classroom or with learners they don’t think they can handle (trust me though, you can).  But that is so not the case!  Perhaps you see yourself leading a pull out Learning Center for kiddos with dyslexia and learning disabilities, or run a class for Emotionally Disturbed high schoolers, then a Mild Moderate Credential is the way to go.

If you see yourself working with kiddos with Autism or Multiple Disabilities, you should probably go for your Mod/Severe.

If you specifically want to work with people who are Deaf or Blind, you may need to try for a more specific credential of VI or DDH.

You don’t need to know everything before you get your credential, but considering it is going to cost money and take up years of your life, I suggest you have some idea.

My personal opinion, even if you are afraid of the ‘bigger’ disabilities (the fear is just of the unknown y’all), go for your mod/severe. Many places will hire a mod/severe for a mild/mod position anyways. But not the other way around.

Now let’s dig a little deeper into what exactly you might be doing with your fancy new credential.   Chances are, your program required at least some volunteer work or student teaching, so you should know what kind of program you COULD get.  I suggest volunteering/working in as many different types as possible before needing to get a real person job.  Maybe you even got lucky and were able to Intern during your credential! An internship is a *PAID* big boy/girl teaching job that you can have while you are still in school.  Usually your school will hook you up with a mentor and you still have to take all your classes and go to all your mentorship meetings.  While this sounds like a lot, and yes it usually is, it is an easy way to get into the field and pay your rent at the same time.  More on internships at a later date.  If you can’t intern, districts are ALWAYS hiring subs and paraeducators/instructional assistants! Another brilliant way to get into the field and find your dream classroom.

Once you have whatever your state/country requires for the field, it is time to job hunt! Lets hope you made some connections during your student teaching/volunteer work because Special Education jobs are so hard to get! *Insert Sarcasm Emoji here so you know I’m kidding*.  But seriously, unless the teaching world drastically changes in the next 5 years, I think it’s pretty safe to say that you have some job security.  At this point, the hardest thing is just making sure all of your paperwork is in order.  Did you know after I got my MASTERS degree and CREDENTIAL, I still needed to pass 3 state tests and pay a fee to register with the state? Do you know any other job where they do that? I mean maybe Doctors? But med school? No thanks.  (Although my pay might be a little better….)

If your state has a job site for education positions, it would definitely be worth it to sign up. Many districts in California post jobs with EDJOIN.ORG.  Once you upload your resume, tests passed, and credential, then its an easy few clicks to browse and apply for a teaching job.  If they don’t have an Edjoin equivalent and you find yourself searching through districts, you can help yourself out by searching using Google Keywords. Instead of searching by going through each districts webpage, you can search specific phrases on google and hopefully get narrowed down results.  This also helps if you aren’t really specific about where you want to be.

However if you have a dream district, you can stalk their job boards and hope something comes up, or you can send your resume and a stellar Cover Letter directly to HR and try to sweet talk them into an interview.

But let’s get real again for a sec, Your first job is probably going to suck.

Hey you may get lucky and find something you love right off the bat.  But chances are, you wont be in love with your first teaching job.  AND THAT IS OKAY!  Between the ridiculous learning curve, the difference between districts, and the fact that no two children with disabilities are alike, you couldn’t possibly have been fully prepared! And hopefully no crazy admin is expecting you to be.  My first teaching job was an internship.  I started late October to a Self Contained Autism Program that had been completely taken over by a new district.  They were understaffed. We were on an old run down elementary campus.  We had significant behaviors I had never experienced before. I cried quite a few days on my 45 minute commute home.  I luckily had kind paras and a dedicated admin that helped me survive and thrive.  And though I ended up moving and leaving that job, it will always hold a special place in my heart as a place I learned SO MUCH.

I am not scared to admit that my new classroom is classroom number 4 for me as a teacher.  I have taught in a Non-Public Setting, an LD Middle School classroom, a K-6 for Severe/Profound multiple disabilities, and currently I am in a K-2 Autism Classroom. I have been in charge of as few as 1 paraeducator and as many as 6. I have been the newbie on campus and the more experienced one.  And though I definitely did not LOVE every position, I was able to LEARN from each and every second.

My point being, you may not like it at first.  It may take you a while to crack where you fit in this vast system. There is SO much opportunity and diversity in the SpEd World.  Stick to your strengths and remember that even though they probably did not teach you this in grad school, it’s OK to not know what you want to do with your shiny new SpEd degree yet.

Thank you so much for taking the time to read! If you liked it, leave a comment below or on my Instagram @funfunctionaleducation. And stay tuned for the next post in the series: TSTDTY About How to Nail Your Teacher Interview!
 

Functional Assessments for Significantly Impacted Learners

If you have students with significant physical, medical, or academic needs in your classroom, it is often easy to overlook the basics of education in favor of the things that are functional. This isn’t a bad thing! In fact, I would say that 60-70% of your instruction in a significant needs setting SHOULD be on functional academics, regardless of the age of your students.

–HOWEVER–

Just because you are in a functional needs class, does not mean that you can skip basic academics.  In fact, many functional skills can not be completed without them! But if you have a student that has difficulty moving their arms or fingers, gives answers using Eye Gaze or is not a good fit for regular normed assessment, how are you supposed to gauge what they do or don’t already know!?

I know that I struggled with this for a long time.  I would get new students that used wheelchairs, or only communicated with icons and simply try to teach my functional curriculum or the district curriculum (Unique) without actually knowing if they even knew their basic skills such as numbers, colors, letters, etc! And as far as I knew, there wasn’t a good assessment available for these kiddos.  We had the Brigance and the WIAT available and both required students to either be able to talk or to receptively identify/point to the correct response on TINY little booklets.  Definitely not a functional way to assess learning for all of our kiddos!

So if you can’t find what you need, what do teachers do? You make your own!
I actually made the original version in my Pre-TPT days using Microsoft Word.  Junk? Maybe, but it worked! In fact, some of my pages of my official copy I use (colors, letters etc) are still from the original! If it ain’t broke…..

So how would you go about using these assessments functionally in your classroom?

My first recommendation is to ASSESS TO YOUR STUDENT!
The best part of these is that they AREN’T normed or scaled or blah blah blah.  While those can be great references for some students, our families usually already KNOW that their child is behind grade level.  Giving them this information again isn’t usually helpful.  This also means you can Test your kiddos how you know they will best tell you what they know.  For some students, I can put 2 – 4 icons on a felt board and let them use their hands to make a choice to the prompt e.g. “Where is the number 3?” for students using eye gaze only, I can hold the two icons on either side of their vision and give the prompt and wait for them to look at the response.  If a student has a 30 second wait time, be sure to USE IT!  If a student is only good at answering Yes/No questions, you can give questions one at a time as a Yes or No response, “Is this the letter B? Yes or No?”

Next: TAKE DATA AND REPORT IT OUT!
The data sheets included are intuitive and simple, but if you don’t know how to interpret them, then they are just data sheets.  So here are some tips for taking the data and how to report it out.   When taking the data during an assessment session, make sure that you are familiar and comfortable with the abbreviations/notations, or use what works for you.  A student getting a question right with partial physical prompting is VASTLY different than a student getting it right independently and unprompted.  Also be sure note wait times and number of times you had to repeat the prompt.   Secondly you will want to note trends in your data.  Does the student know their numbers but need help with Letters? Can you see that they get all of their consonants but miss their vowels? Did you even know that they knew all of those shapes?!
When you report this data, try to keep a strengths based approach.  Like I mentioned before, parents are often told time and time again by assessment after assessment that their child is “Below Average” or “Below Grade Level”.  How discouraging!   Instead of saying “Jaime doesn’t know his numbers or shapes.” you can say “Jaime is making progress on identifying letters, he has receptively ID’d 20/26 letters and is working on his shapes and numbers!”  Doesn’t that sound a bit more positive? And it gives the same information!

There are endless options and opportunities to allow students to demonstrate knowledge!  I am constantly shocked by my students.  Students who we thought could only answer Yes/No are accurately ID’ing ALL their shapes!  Students who can barely move their arms or legs are moving their eyes and telling me they KNOW IT! And telling their parents how much their child actually knows is just half the fun!

If you need to assess for highly specific things, feel free to make your own! But you don’t need to reinvent the wheel here! I have a Basic Academic Assessment with Level 2 coming in June, as well as 2 Levels of My Math Assessment already ready for you! Just laminate, velcro, and store in a binder and you will have these for YEARS!

Do you use eye gaze or icon assessments with your kids?  What was something you learned that shocked you?  Let me know in the comments!

Blog Post Assesments


Reverse Mainstreaming! Is it right for your class?

Reverse Mainstreaming is becoming, well, mainstream! (Please excuse my sloppy pun).

Here’s the deal.  If you’re like me, sometimes you have a classroom of students with pretty significant needs.  And sometimes you have Para’s out.  And sometimes you have a major blowout or puke and need all hands on deck. And sometimes…..well, you get the point.  Managing a classroom of students with mulitple levels, grades, and needs AS WELL AS a team of paras, specials, schedules, etc.  It can be tough to find time to send a student and a paraeducator out of your room for certain times of the day.

Lets be honest here.  In a perfect golden world, General Education (GE) teachers would be trained in Including students with different Needs. Class sizes would be smaller, they would have assistants to help differentiate materials, and full inclusion would be the norm.   THAT. DOES. NOT. HAPPEN.   I am 100% for full inclusion or mainstreaming when done correctly, but the honest truth is, if you are just throwing a 3rd grader in a 3rd grade class for an hour of ELA when he/she is at a Pre-K reading level, what are they really getting out of that experience? Most of my experience has been; they get overwhelmed, they get distracted because they don’t understand, or they shut down.   And that is an hour I could have been teaching him to read at HIS level!  To each their own.  If you mainstream and it is working for you and your class, KEEP DOING IT! But you may want to consider Reverse Mainstreaming as well!

Reverse Mainstreaming MAY be right for your class if:

  • Your students have behaviors that may be destructive or too distracting in a General Education setting.
  • You are short staffed or can’t spare staff members to attend a general education class with 1-2 of your students at specific times.
  • Your students are more than 2 grade levels academically below their actual grade and would be overwhelmed or bored in General Education classes.
  • You have uncooperative General Education teachers or teachers who are apprehensive about Mainstream Time. (I mean, not ideal, but it happens)
  • You want GE kids to be nicer and include your students more.
  • You want the GE kids to know more about your class and your students!

What you need to do:
I’m going to explain how I went about beginning this program with my school.  Feel free to leave additional information/tips in the comments! Not every school or district is the same so the more advice the better!

First things first, some background on my class situation.  I run a County Class – a Severely Handicapped Program that takes some of the more Severe medical and academic needs from 3 small local districts.  We are housed on a district campus, but I do not work for the district.  I have my own separate Principal and all of my staff also are employed by the County.  This can be/is super confusing.  So for example, I do NOT need to go to any of my Elementary Campus’s Prof Development days, after school meetings, etc.  The county has their own.  This is great because our county PD can focus on OUR classroom needs (I know many a District PD day I have been bored out of my mind because they were going over something we just didn’t use).  But it can also be isolating, I don’t get to bond with the campus staff as often. This is my 4th year with my current program but due to logistical reasons, we changed to a different Elementary Campus this year.  The change has been WONDERFUL for my students and staff and we feel very welcome here, but we needed to get a whole new staff and student body used to our students and their needs! Some kiddos haven’t even SEEN a student with this level of needs before! Daunting!

So first, you need get the staff at your school acquainted to your program. If you have been on your campus a while, you’re probably already close with your co workers.  If you’re new or you think your colleagues could use a refresher, ask to take over a 30 minute time slot during a training or PD day!   I love power-point so since we were new to this campus, I asked the Principal (who is an angel) if I could commandeer a slot of their first day back meeting in August.  I threw together a power point on my class, my students, our schedule, what we do, etc.  It looked a bit like this:

And ask if they have any questions!

After things got settled on campus and we were in our routine and our specials, I asked the principal if we could step it up with some visitors in our room.   We have 2 students who go into GE classes at specific times during the day, but I wanted more school involvement and social skill opportunities! I have 11 kiddos grades K-6 and only 3 paras and it would be extremely difficult to manage the Ins and Outs if my kiddos were travelling all day .

We started bringing in some kids during Music Class and loved how the dynamic was working out.  When my Principal gave the go-ahead, I put together a sign up sheet though Google Docs and Shared it with the teachers.  It looks kind of like this:

Friday Jan 11th

Time and Activity Class and Students (3-5 Preferable)
915-945 Library Mrs. Dawley – Molly, Olivia, Mackenzie
10:15-10:45 Music Mrs. Hugues- Savanah, Addison,
12:30-1:00 Games Mr. Moore – Amber, Gio, Anthony, Layla

We started with every Friday (Since we have fun Fridays anyways).  I put down 3 time slots and was overwhelmed with the response.  EVERY slot was filled from November through December!  I ended up adding 2 slots on Mondays for Jan/Feb to help with demand!   I would offer to have a para go get the younger students (K or 1st) and bring them back afterword.  Older students met us at our door.  I send reminder e-mails to teachers the morning of and send pictures of their students engaging with ours when the day is done.

I put together a paper based on the above power point that teachers can share with their students and I will talk to the group (usually 3-5 kids at a time) about what we are doing before they enter the room.  I tell them that ALL questions are welcome.  Fear comes from the unknown!  I considered giving them a big speech before they enter about “How people can be different” etc. But honestly sometimes I don’t say anything!  Why, You might ask? Because simply giving that speech implies that our students are “Different”, and that is NOT the message I want to give.    When I give simple instructions on what to do and who to hang out with, the students are more under the impression that things are ‘normal’ and less likely to be scared or apprehensive!  And if you do happen to have a behavior or issue come up, just re-direct and MOVE ON! You don’t need to dwell or feel like you need to explain yourself!
For Example: During game time, we had 4th graders with us in our room.  One of my students grabbed a handful of tiles from the memory game we were playing and threw them on the ground.   I simply smiled and said “Jimmy, no cheating!”  We all laughed and I sat near Jimmy the rest of the game.  The kids probably don’t even remember that happened.  Crisis averted.

We have students join us for:

  • Music Class- assisting with instruments and manipulatives, singing along.
  • Sensory Room- playing with students, doing Yoga, rolling/stretching
  • Games- Playing board games, practice turn taking, communication
  • Library or Reading- Read books to our students
  • Movies- watch movies with us, enjoy each others company, eat POPCORN!

THE BENEFITS
Hooooooooo boy, there are so many!  For my students, my top 2 are communication skills and social skills.  There are many more opportunities for communication when you have students who are unfamiliar come in and are asking lots of questions! Social skill opportunities come up more frequently and naturally with general education students than with being in our classroom learning in unnatural situations all day (sorry, but practicing making friends with your teachers just isn’t the same as the real thing!)
And for the General Education students, honestly they probably benefit the same or even more than my kiddos.  Forget the basic quality benefit of just exposure to people who are different than they are. They are learning empathy and how to communicate with nonverbal people.  They learn some sign, and they learn how they take easy things like going to the bathroom or saying yes and no for granted.  And most of all they learn that they CAN be friends and have FUN with our students!

THE DOWNSIDE
If you have behaviors in your class, such as aggression or tantrum, there may be a risk of a GE student getting hurt.  Personally, I will make sure that GE students are placed as helpers with students who are having a good day and making good choices.  It may be embarrassing/awkward to have to explain to a GE kiddo why your student is throwing toys or stomping his feet in the back of the room, but don’t make it a big deal, and they wont either.
If you have uncooperative admin, they may say that you are taking away from “Academic Time”.  I come back with the Benefits List.  You can also use the time for peer tutoring, have older student help with Math or Writing Centers and Younger students with Art or PE!  It is up to the GE teachers to decide when to send their kids.  Some choose during Free Read, and some during their Art or Library Time.  It is really up to them, so I do not know how they justify it.  But I know if MY child was going to help out in a special education classroom, I wouldn’t be worried about if they are missing some silent reading 🙂

Have you tried Reverse Mainstreaming in your classroom? How did it work out? What did you do?  Let us know in the comments below and be sure to share on Facebook or Pinterest!

img_4491

blogreverse

A New Sp-Educators Guide to the First Week of School!


Congrats! Maybe this is your first new teaching job! Or maybe you had to switch positions or states or sites. Or maybe you aren’t new but you’re looking at new ways to help with the first week of school jitters?!  Although my experience is mostly in self contained classroom settings, I hope any SPEDUCATOR can gain something from this post- if anything, just knowledge that you are NOT ALONE! Everyone, from veteran teachers, to para-educators, to parents, are a little nervous about the new school year.

First- The DON’Ts!

YOU DON’T NEED TO KNOW EVERYTHING!

Coming into a new classroom is hard enough.  You have a pressure on you to be a team leader, a data collector, a colleague, and to know what your students and parents want.  That is so stressful! Oh wait, and you actually have to teach! However, trying to come across to new peers like you know everything and don’t need any help is a definite faux pas! You will learn more in your first few years of teaching than any college classroom could have taught you.  And you will continue to learn long past those first few years.  Keep an open mind and embrace not knowing! And that brings me too…..

YOU DON’T NEED TO HAVE EVERYTHING FINISHED!

I have been at my current site for four years. And we JUST got all of our data clipboards finished :-/ Teaching special learners requires a flexibility that some educators can’t seem to comprehend.  The minute you create a perfect schedule, you will get thrown a new student whose behaviors and pull-outs don’t fit.  Such is life.  Just as you don’t know everything going into your new position (see above), you will never have ‘everything’ finished! And that is OKAY! I honestly have never met a special educator without a to-do list a mile long.  And that shouldn’t stress you out! Having a to-do list just means “Look at all these awesome things I want to try someday!” If your classroom isn’t constantly changing, I’m betting there are some bored kiddos in it!

YOU DON’T NEED A PINTEREST WORTHY CLASSROOM!

It is SO EASY to be an inspired teacher nowadays.  Right now my instagram feed is flooded with Target Dollar Spot and Michael’s and Hobby Lobby.  And while my bank account is the real thing that is preventing me from driving to the nearest shopping complex, I will try to say it’s because I know that “MY WORTH AND EFFECTIVENESS AS A TEACHER IS NOT MEASURED BY THE COLORS ON MY WALLS OR THE $$ I SPEND!” (say it again!) And honestly, in Special Education, it can even be overstimulating for your students! I had to take down a WHOLE WALL OF DECOR because my BMT came in and told me it was wayyyy too distracting for my student with Autism who worked right below it.  If you want  a pretty wall for YOU, and it makes YOU happy, GO FOR IT! I like my classroom to be pretty but also pretty basic. But the MOST IMPORTANT things in the first few weeks are establishing your schedule and routine, learning about your students, keeping your students SAFE, and following the IEP. Pretty walls do not make that list.

DON’T BE SCARED OF PARENTS!

The first few days of a new teacher are hard for parents, and I didn’t really realize it until I had to choose a daycare for my son. I can only imagine what our special needs parents go through! “What do you mean a new teacher, they don’t KNOW him! How do I know they are GOOD? How do I know they will keep my child SAFE?”  So nerve-wracking! So if they seem a little pushy, or harsh, try to connect.  Let them know that YOU SEE THEM.  You are on the SAME TEAM!  Ask them their opinions! Ask what WORKS for them! You will be so happy with the relationships you build those first few days that it will make the rest of the school year so much easier! See THIS POST on stress free IEP’s for more on building that relationship.

And now, the DO’s!

DO BE PREPARED!

While you don’t need to have everything 100% ready, it is important to have the basics.  Set up a schedule if there isn’t one already established.  You should already know the general levels of your students.  (If not please ask your administrators or colleagues their thoughts! I am a huge advocate of allowing teachers the see IEP’s BEFORE the school year starts!)  Prepare some activities that will explore your monthly/weekly theme (check out my Back to School Theme Unit) or some basic skills tasks.  If you will be using a curriculum like Unique (see HERE for a blog post on what I use from Unique) then prep some stories or matching activities for centers.  What’s the worst that could happen? They are too hard, or too easy! Then what? Try again! It is not the end of the world!
Always learning, remember?
Prepare your para-educators on your expectations as well. Are you going to be providing Zone Coverage or Man-to-Man Defense those first few days? Who will be tackling toileting or feeding? Which also leads nicely into….

DO LISTEN TO YOUR PARA-EDUCATORS!

Chances are, your para’s have been there a while. Either in your classroom or they have been in the field longer than you. And that is OKAY! You may be younger than they are, or feel like you need to prove yourself in some way.  This is so not the case! Yes, you have the education and the degree.  This is your classroom.  But this classroom WILL NOT FUNCTION without a good TEAM.  I can honestly say the best advice I ever got was to “never tell a para to do something you aren’t willing to do yourself”.  In my experience, the first week at each site I moved to, I tried to step back and let them do things the way they had in the past.  I was THEIR Para, jumping in when they needed me. Then slowly I introduced changes, schedules, data collection, etc… as appropriate. This may work for you! You may come into a new room with all new Para’s, and that is great too! They still will have their own experiences and ideas that you should respect and listen too.  They may never fully understand all of the responsibilities and legalities you have to deal with, but that is what you are there for. They are there for the students. If you are interested in a great tool, the Para Training Manual from The Autism Helper has so much great info even experienced para’s can learn from it, and it is editable for your specific situation.

DO ASK FOR HELP!

In one instance, I moved from a functional to an academic middle school program with class periods.  And I was so LOST! What do you mean I don’t have MY students all day? I relied heavily on other special educators on my campus and my amazing SpEd director  that year. They know you don’t know everything. And I am sure that they WANT to see you succeed! A Simple “What do you think about….” can help build relationships and increase your teaching skills!  If you have a new teacher program, take advantage of it! And not just with your supervisors, try to connect with other new teachers and compare notes (and funny stories)!

DO HAVE FUN!

You may have these students for 5 years, or only just one. But you don’t have to be a perfect teacher to leave a lasting impression on your students and their families. They don’t know you were freaking out that first day or first Back to School night.  They don’t know you cried after your perfectly thought out STEM lesson got destroyed by a behavior or how you think your observation went bad… But they will remember the pictures of them enjoying their centers, or the data that goes home showing a decrease in problem behaviors, the silly dance you did for the holiday parade, or the shaving cream you accidentally dyed the table with.  Laugh often, don’t take yourself too seriously, and Enjoy every second!

Slide1

What tips do you have for new Special Education Teachers?  Leave them below!

Planning and Prepping for a Stress Free ESY

Slide1

How does your school run ESY?

If you are lucky, you can stay in the same class, with your same kids, and basically run the same program that you do over the school year (with a fun summer theme of course).
Some of you, like me, don’t even start ESY until late summer! (Ours runs July 2-27 this year!)

But not all of us in the SpEd world are that lucky.  I actually AM blessed by this in my current job, but that was not always the case!   I’m one of the weird ones who actually LIKES teaching summer school.  It always just seemed more “DayCamp”-y to me.  You can have water balloon fights, picnic outdoors, have water days or trips to the local pool, teach community skills and get PAID for it! Sign me up!  Here are some tips and tricks I picked up along my ESY teaching journeys.  I hope they help you too!

IF YOU ARE CONTINUING WITH YOUR SAME KIDDOS:

K.I.S.S. ( Keep it Simple, Silly!)

Okay, so this is an easy one! Pick a fun Summer Unit, continue with a similar schedule that you followed during the school year, and GO!  In all seriousness, if you have the same kids, you are already lightyears ahead of some of your peers.
I like to keep a VERY similar schedule to the school year, especially since some of my kiddos with down syndrome and Autism are routine driven.  Work on their goals, OT, PT, PE, etc. You already know what they need to learn, so just continue!

My Summer School Schedule looks like this:
8-9AM-  Arrival, Toiletting, Positioning, Independent Work
9- Snack
9:30- Recess
10- Circle/Morning Meeting
1030- Group Work
11- Bathroom, Hygiene
1115- LUNCH
1145- Music & Home!
So Simple and goes by so Fast!  The only things I need to prep are my group work for the day (I am following my new Summer Unit I just put up on TPT) and independent work stations for my kiddos who are able in the mornings.
Slide1
Plan a few fun trips if you are able.  Even community walks count! Get out of the classroom, do some outside science experiments, explore your community!  Where I live, it will probably be in the high 90’s-110 the whole of summer school, so we are going to the Pool on Fridays, and a park with water features on Tuesdays.  We will have fun water based play, bubbles, etc for recess on days we are in class all day.

Summer School is a time to try new things! If they work, AWESOME! Incorporate them into your school year! If NOT, Oh well- it was only summer school 🙂

I remember vividly a parent that was adamant that his son would NOT do well at the pool, would throw a tantrum leaving, etc etc.  We took him anyways, primed him with a social story, and honestly it is some of the happiest pictures I have of the kid.  And guess what, NO TANTRUM! Some of my kiddos in wheelchairs, this was also the ONLY time they ever got to go to the pool! So explore on!


IF YOU ARE IN A NEW SITUATION:

First of all, try not to panic.  But also, try not to over-do EVERYTHING!

As a Special Education Teacher (or any Teacher for that matter), I know you want to be as prepared as possible.  When I taught out of my class for Summer School I was placed with a different age group, kids with behaviors, and a room on a campus neither of us were familiar with.  Stress City!
Here is how I survived:
1. USE THE PARAS- If they are the same para’s as the students are used to, you are GOLDEN! What is there schedule, what do the students like/dislike? ASK!
2. If you do not have access to the same paras that have worked with kiddos before, try to observe them before ESY.
3. If you have new Paras and you can’t observe them, can you talk to their Regular teacher? Send a quick e-mail just asking if there is a Sub Binder or anything else you can get your hands on (their routines, favorite activities, etc) to help your ESY go smoothly!
4.  Read the IEP’s.  Or at least the IEP’s at a Glance. You should be doing this anyways…. BUT I DIGRESS.  You don’t need to memorize it, but knowing if you will be dealing with behaviors, what level the students are at, etc can be super helpful in your planning process.
5. Make a schedule.  Find out about Specials like speech and OT,  ask if you can go on trips or if some are already planned.  Then create your schedule.  Remember, this is not the regular school year.  You can have a little scheduled down time! But remember that behaviors are way less likely to occur with any student if they know what is coming next. Write the schedule on the board or use visuals.
6. Invest an hour in a planner. Use a template (I love Chalkboard_Superhero or Joey Udovich, but there are hundreds of templates on TPT) and jot a group work or activity to try each day during that scheduled time. It might look like this:

Monday-  Group Work- Word Wall    Recess- Bubble Play
Tuesday- Group Work-  Vocab Spelling Activity  Recess- Walk
Wednesday- Group Work-  OT Cutting Skills     Recess- Water Painting
Thursday- Group Work-  Art Cut and Paste Sun Project    Recess- Outdoor Music
Friday- Group Work- Counting Activity    Recess- MOVIE DAY

Copy, paste, and edit for 4 weeks (or however long your ESY is).  Try not to repeat a lot or you will get bored staff and bored students.  But don’t make it overly complicated either!
Some things to look up on Pinterest to get some great ideas:  Sensory Play, Music, Summer Art, Recess Activities, Indoor Recess Activities, School Water Play!

Then all you need to do is add in your independent work/lessons.  This can be as simple as setting up pre-existing task boxes or printing worksheet lessons for students.  You don’t need to re-write the IEP for this one. Pick a few goals and focus on those.  If Johnny has a spelling goal and Counting goal (along with 10 more), focus on those two and prep those materials.  PRO TIP: Do it all Friday afternoon and you will be stress-free come Monday!

Well that’s all I got.  Actually no, I got a lot more but I’m sure you’re probably done reading and ready to start planning!  If you are interested in my Summer School Unit, click HERE.

And I hope you have a fabulous, cool, stress free ESY!